
Welcome to this noob tutorial on how to get your own website online, quick and for free.
First off you should know that this is NOT a complete guide on how to fully operate your future website and all the vast possibilities. I will happily lead you to the moment of the deployment and the emotion of having your own website on the web. To go further i suggest two main sources of great information that are:
- blogdown: Creating Websites with R Markdown by Yihui Xie, Amber Thomas, Alison Presmanes Hill
- Up and running with blogdown, by Alison Presmanes
Those above are the creators and the masters of blogdown, therefore i strongly suggest reading them.
Well, now, without further ado, let’s get to it!
I assume that you already have R and R-studio installed on your computer. So I’ll skip ahead.
Let’s start from installing some packages:
- install R “devtools”
- install the package ‘blogdown’
- then you should load it
- then install ‘Hugo’
to do this you can copy paste these lines into your R console if you are too lazy to type:
install.packages("devtools") #1. install R 'devtools'
install.packages("blogdown") #2.installing 'blogdown' package
library(blogdown) #3. loading it
blogdown::install_hugo() #4. installing hugo
after a bit Hugo is installed. From now on things get more complicated, yeah i know we just started!
BUT it is because we here introduce the use of git.
git is a version control system that basically allows you to save all your steps and go back if you screw something up (if you know how to use it properly…). Since this is a noob tutorial i won’t go into details on how git works, i will let this to your good willing to learn something new today. Moving on.
The first thing you want to do is to create your own repository on github
If you don’t know what I am talking about it means that you probably have to subscribe to the website first https://github.com/, it’s free! Come one! DO IT

follow the instruction on screen and you are good to go.
when you have your own github account, you can now create your first repository.
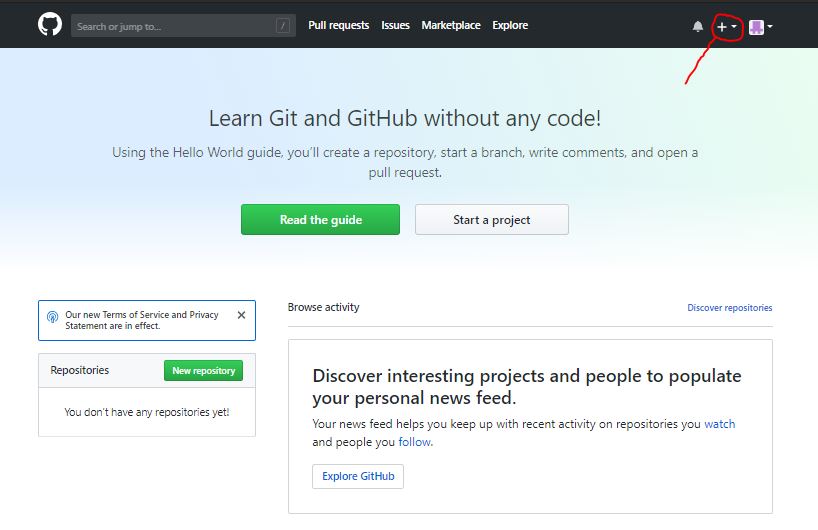
to do that, you click on the plus sign of the screen after you subscribed:
Now choose a name for you project, e.g. “MyWebsite”
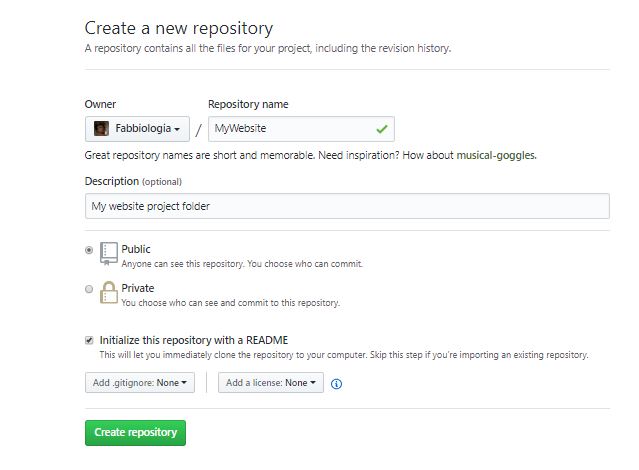
it is very important that you select the option to initialize your repository with a README file. now you should just click on the green button “clone or download”
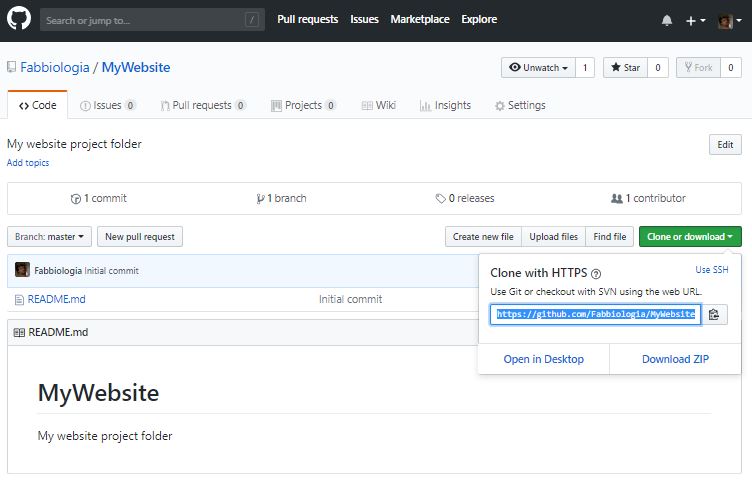 select the URL and copy it, you will need it in R-studio.
Now go to R-studio, you can see that on the bottom of the GUI, there are two panels, one is called Console, where you can input commands to R. The other is called “Terminal”, this is an emulator of your computer terminal, where commands directly influence your computer environment, thus be careful to not mess thing up.
Select the terminal panel, you will notice a command line slightly different from the one you are used to on R.
also before the command prompt, you will see your working directory you are in right now. In my case it is under “C:\Users\zephi\Dropbox\SeaEcoLab>”
You should now move to the directory in which you will create your new project. Mind that we will create another folder in the following step, so it will be a sub folder of the directory you choose to start with. If you are happy with the default choice and want to create your folder right now just go ahead and type git clone and copy paste the URL you copied from github.
git clone https://github.com/Fabbiologia/MyWebsite.git
It should appear your URL instead of mine (duh…)
you can also clone directly to other folders, but to do that i will link you to another site with a nice tutorial on how to do that: https://www.atlassian.com/git/tutorials/setting-up-a-repository/git-clone
Now, you generated a copy of the repository you created on the github website in your computer, so just go ahead and change your working directory to the one you created:
cd MyWebsite
you just change “MyWebsite” with the name you choose.
Now you have a working directory that is linked to github, this will help you a lot to improve your workflow, and also to be able to deploy your website at the end of this tutorial.
now it is time to get to the cool part.
Use the top menu buttons in RStudio to select File -> New Project -> Existing Directory, then browse to the directory on your computer where your GitHub repo is and click on the Create Project button.
This will transfer you to your project in RStudio. You should now edit your *gitignore file. You can find it in the files pane (bottom right corner panel).
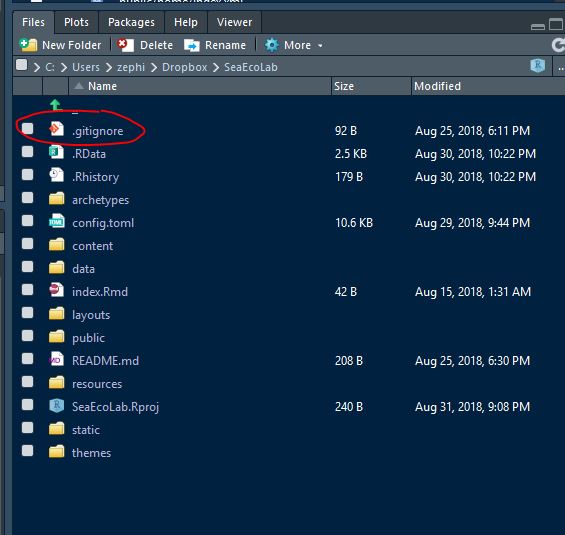
the file should contain the following:
.Rproj.user .Rhistory .RData .Ruserdata blogdown .DS_Store # if a windows user, Thumbs.db instead public/ # if using Netlify
if some of these files are missing you should add them, you can just copy paste them from here. Mind the .DS_Store file. You should add this only if you are a Mac user, if you are a windows user you should add Thumbs.db instead.
Now it is time to create your website with the academic theme. You do that by giving this command on the R console:
blogdown::new_site(theme = "gcushen/hugo-academic", theme_example = TRUE)
Now go to the top toolbar, and click on Tools

and then click project options from the menu.
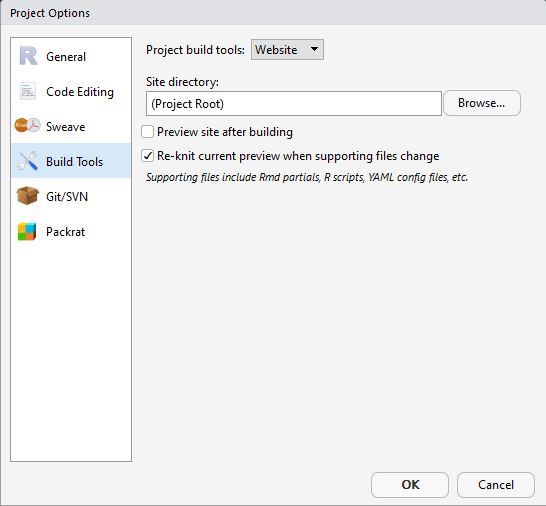
there you should uncheck the “preview site after build” options under the build tools.
You are almost there! Now you should edit your config.toml file. Click it from the File pane as you did for the gitignore file and it should open. The first thing you want to do is to change the URL file under the baseurl option at the beginning of the script.
Now its time to choose your site name. This can be whatever you want, but for this tutorial we will use netlify to deploy it (put it online :) ) so it should be like this:
baseurl = “https://MySiteName.netlify.com/"
also remember to add the / trailing slash at the end of the URL.
You can go ahead and edit all of the other elements, the instruction on how to modify it are very straightforward. This will allow you to add your own information, pictures and files.
When you are satisfied with your changes, you should commit your changes and push to GitHub. To do this, you should notice that in the top-right pane in RStudio there are several panels. One of which is called Git. There you will see all the file you changed and that are different from the online repository, thus you need to “commit”.
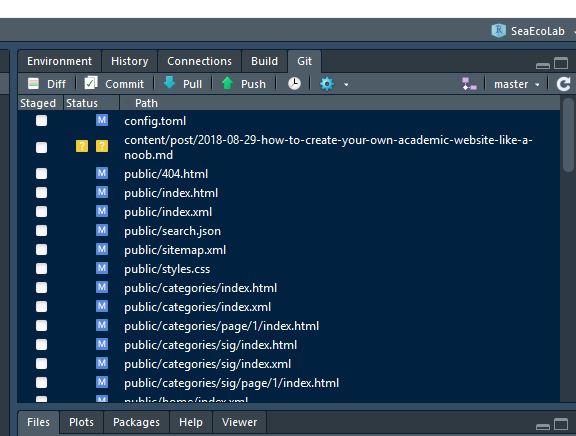
now you can check all of the files you find these will change the colors icon of their status.
Now here i had a problem in my first commit. When you have large files that you want to commit to GitHub, RStudio might crash. That is a problem of this peculiar interface. If you experience such a problem you can easily go around it and do the following in your terminal panel in RStudio:
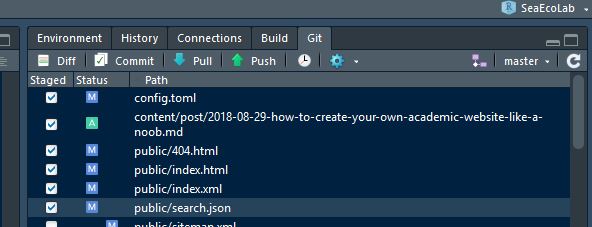
git add -A
this will automatically stage all of the changes. Now that your changed are staged you need to commit them, to do this go back to the git panel in RStudio, and click on the commit button on the toolbar.

remember to put a message to your commit. You should always do that, explaining what you changed and updated, to keep track of your progress (and potential mistakes).
Now go on and click commit. This will open a window with the progress of the commit. If everything goes fine, and no error messages are displayed, you should now click on the green arrow called Push. This will make all your changes immediately effective.
Now do one last thing before go any further. Use this command to check your Hugo version. In the R console type:
blogdown::hugo_version()
and take note of the version number in the output because you will need it in the next step, this is VERY IMPORTANT!!
Now that you tweaked your website you want to know how to deploy your website. You should first go to Netlify website: https://www.netlify.com
Register following the instruction on screen.
then you should log in and select New site from Git.
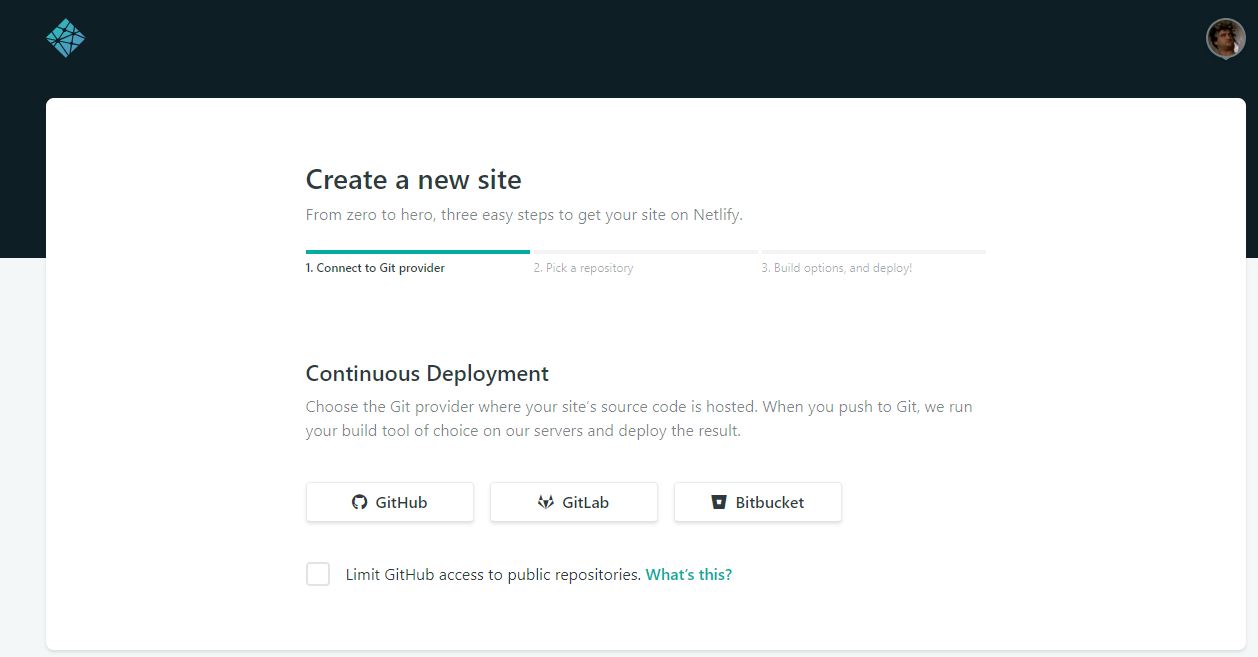
Click on the GitHub icon. From there, Netlify will allow you to select from your existing GitHub repositories. Pick the repository you created and then you should specify to things:
- the hugo version that you are using.
- the folder that contains your public files (the ones that will shape your website)
you will type the first in the settings you see here in the screenshot:
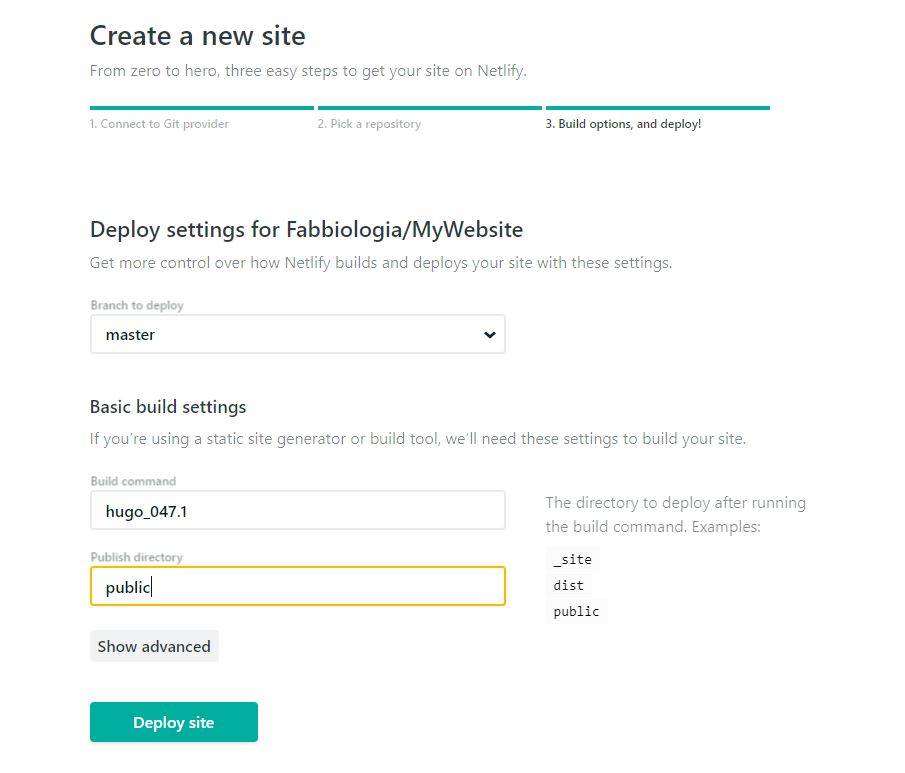
YOU SHOULD PUT YOUR OWN VERSION NUMBER OF HUGO FOR THIS TO WORK! that is why you needed to check it before.
go on and click deploy!
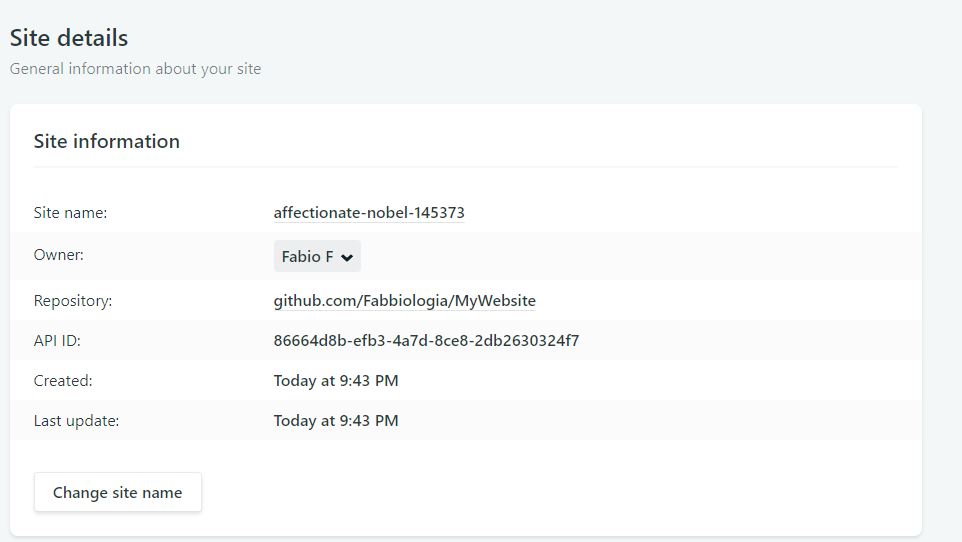
After a while your site will be deployed. But first you want to change your site name. To do this click on Site settings, and click on “change name”.
Then you can change your name to the one you put in your config file. Actually, it need to be the same!!
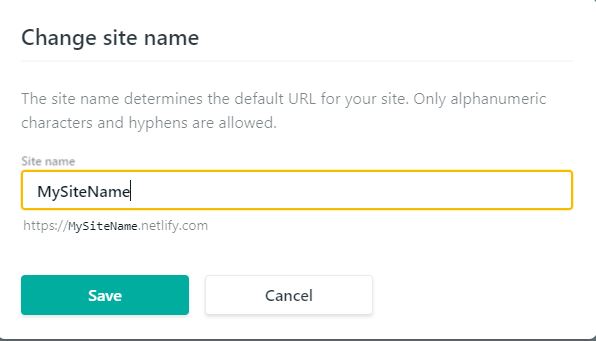
and now you are good to go! click on the link and if everything went fine you should be redirected to your brand new site!! Congratulations!!
Every time you make changes or add posts, you just need to commit your changes to GitHub, as you did for the first commit, and after few seconds netlify will automatically update your website!
Contact me if you have further question! you can find me on twitter, email, or on github. You will find the links to contact me on my home page https://seaecolab.netlify.com/ Cheers!